Metal for SwiftUI
SwiftUI got cosy with a brand new friend this year, called Shader.
Shader is a reference to a Metal shader, and we've got some brand new modifiers to use it inside SwiftUI.
You'll have already seen some great examples of this across social media, and honestly, some of it's pretty intimidating - so let me walk you through adding a simple shader from nothing, and get you on the right path.
I'll be honest, i'm not a math guy, so I'll come at this from the simplest possible angle. I'll trust other people to get fancy with the math - but I'll get your pipeline up and running...with some math.
What is a Shader
A shader is a piece of code that determines the color and light levels for a given pixel.
In our case, our shaders will have a reference to which pixel they're shading, then perform some math on it to determine the color.
You can add more arguments to a shader, such as time, to have the shader animate as time goes on.
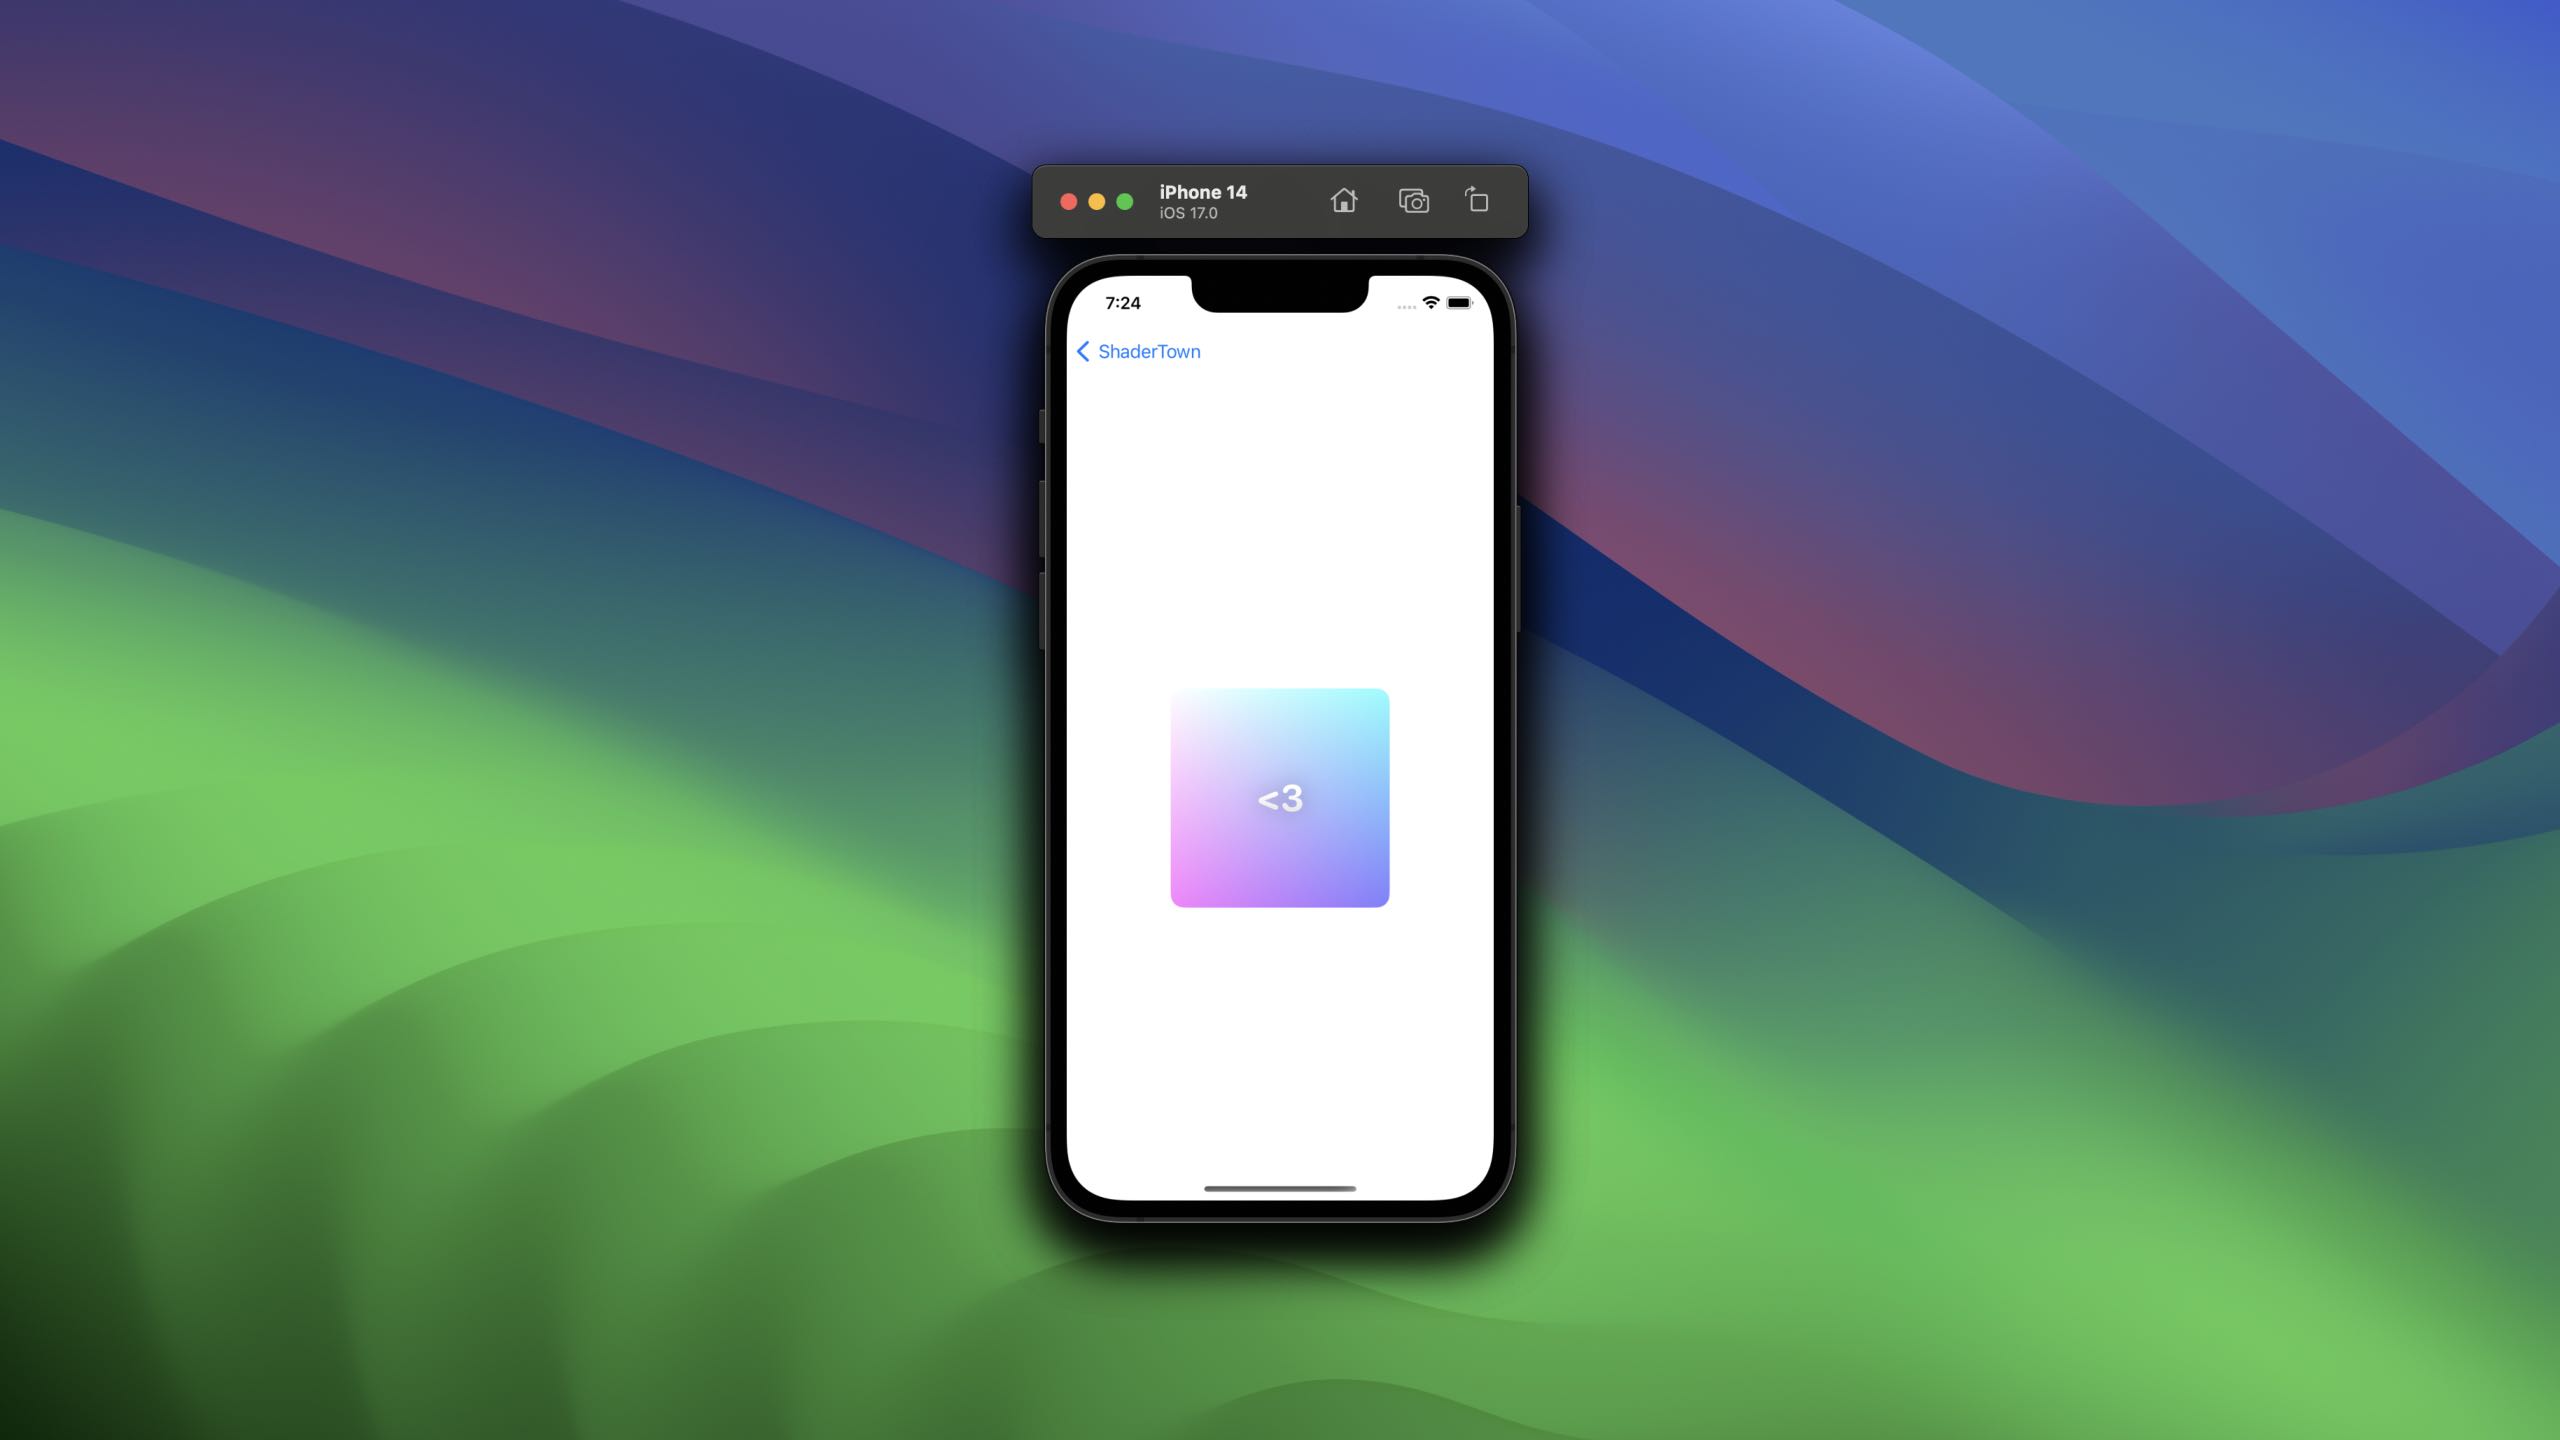
A simple shader could just return a single color, here's what that could look like - I promise, it's not that scary.
[[ stitchable ]] half4 aqua(
    float2 position,
    half4 color
) {
    // R, G, B, A
    return half4(60.0/255.0, 238.0/255.0, 227.0/255.0, 1.0);
}
[[ stitchable ]] half4 aqua(
float2 position,
half4 color
) {
// R, G, B, A
return half4(60.0/255.0, 238.0/255.0, 227.0/255.0, 1.0);
}Lets break down each line of what this shader is.
First, the function signature. Here we're using the bare minimum function defined by Apple for a colorEffect.
[[ stitchable ]] half4 aqua(float2 position, half4 color)
/// Apple's requirement
[[ stitchable ]] half4 name(float2 position, half4 color, args...)[[ stitchable ]] half4 aqua(float2 position, half4 color)
/// Apple's requirement
[[ stitchable ]] half4 name(float2 position, half4 color, args...)The first argument is the pixel position, provided as a float2, which has an x, y. We'll be using float2/3/4 a lot.
The second half4 is the color of the pixel we're applying this to. The goal here is that you apply some math to this color, but in my simple example I'm ignoring it and just returning a solid color.
A half is simply a half precision float - you can convert any float2 into a half2 with a call to half2(somefloat2).
Finally, we return a half4, which is the color we want Metal to render for us. When a half4 represents a color, it's in the format R,G,B,A.
You'll notice we haven't used any
args, and thats because for simple shaders you may not need them.
Using it in SwiftUI
Lets start by using our simple one color shader.
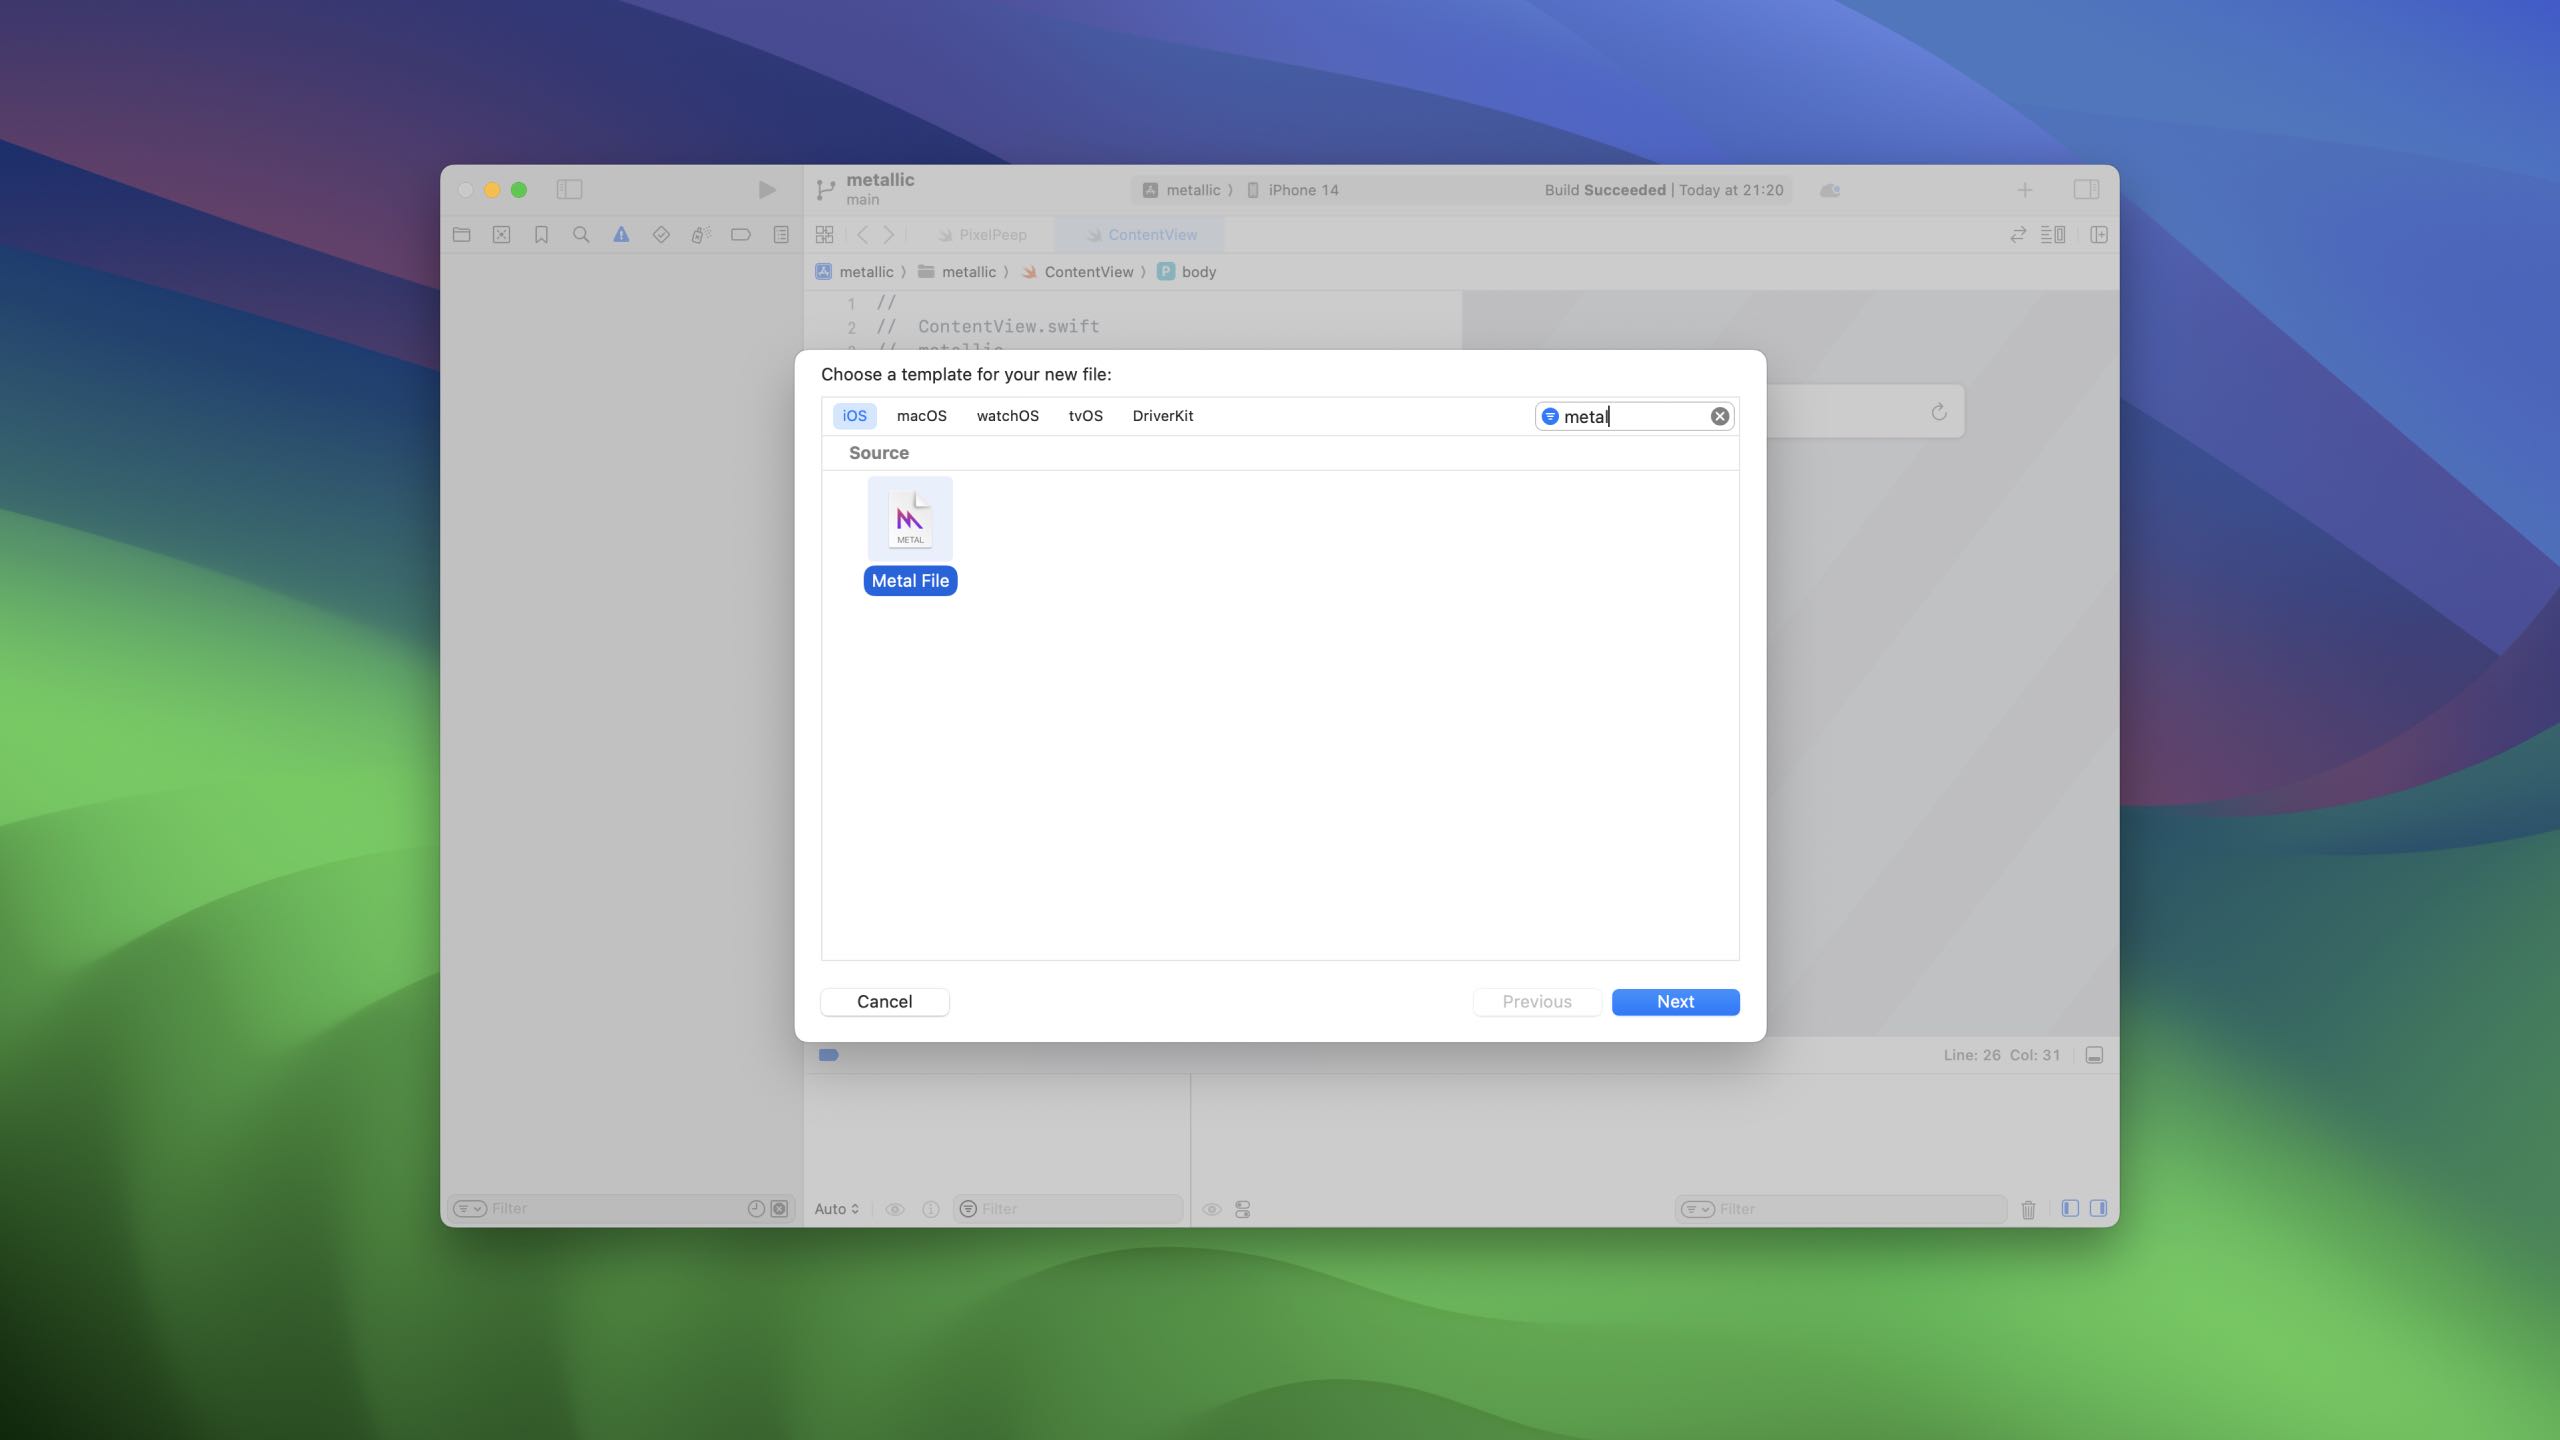
Make a new metal file in your project, and make sure its added to your project. I've called mine Shaders.
Next, lets paste in the shader from above. So your file should just have this in it.
[[ stitchable ]] half4 aqua(
    float2 position,
    half4 color
) {
    // R, G, B, A
    return half4(60.0/255.0, 238.0/255.0, 227.0/255.0, 1.0);
}[[ stitchable ]] half4 aqua(
float2 position,
half4 color
) {
// R, G, B, A
return half4(60.0/255.0, 238.0/255.0, 227.0/255.0, 1.0);
}Now, lets say hello to the new stuff, and write a modifier to make a view aqua ( via metal ).
Start with an empty extension on view, called aqua.
extension View {
    func aqua() -> some View {
        // todo
    }
}
extension View {
func aqua() -> some View {
// todo
}
}Lets fill it up with metal.
SwiftUI has a way to represent any given shader function, called ShaderFunction, which we'll start with.
ShaderFunction asks you for the library it should find the function in, and the name of the function - in our case, "aqua".
func aqua() -> some View {
    let function = ShaderFunction(
        library: .default,
        name: "aqua"
    )
}
func aqua() -> some View {
let function = ShaderFunction(
library: .default,
name: "aqua"
)
}Next, we use Shader. Shader asks for the function we just had, and the arguments we want to pass it. We'll come back to arguments later, but for now lets make this empty.
func aqua() -> some View {
    let function = ShaderFunction(
        library: .default,
        name: "aqua"
    )
    let shader = Shader(function: function, arguments: [])
}
func aqua() -> some View {
let function = ShaderFunction(
library: .default,
name: "aqua"
)
let shader = Shader(function: function, arguments: [])
}Finally, lets meet the new modifier colorEffect. This simply asks for the shader we've just built, and a boolean for if its enabled or not.
func aqua() -> some View {
    let function = ShaderFunction(
        library: .default,
        name: "aqua"
    )
    let shader = Shader(function: function, arguments: [])
    return self.colorEffect(shader, isEnabled: true)
}
func aqua() -> some View {
let function = ShaderFunction(
library: .default,
name: "aqua"
)
let shader = Shader(function: function, arguments: [])
return self.colorEffect(shader, isEnabled: true)
}If you apply this to a view, you'll see it's now aqua - great!
Note that we haven't provided any arguments to our shader, but yet the shader has been provided two arguments, these come from SwiftUI itself.
Lets take a step back into metal, and write something thats a little fancier.
Writing fancier shaders
We're gonna get kinda low level here, and use a different language, MSL.
In order to help you get to grips with this, we'll be creating a simple shader that rotates colors over time.
Hopefully by the end of today, you'll know enough to mess around ( and find out ).
For this to work, the shader needs to know the size of the view it's shading, and the current time.
Here's what that function signature will work like. We've added a float4 to act as our box, and a float for our seconds.
The box we get provided is like a CGRect, x,y,width,height, accessed with x,y,z,w.
[[ stitchable ]] half4 gradientify(
    float2 position,
    half4 color,
    float4 box,
    float secs
) {

}
[[ stitchable ]] half4 gradientify(
float2 position,
half4 color,
float4 box,
float secs
) {
}Lets start with our function body.
The first step, which is a common one, is to normalise the coordinates from 0 to 1, as thats far easier to work with than something like 233,122, and most of the math you'll end up doing is based on percentages.
// Normalised pixel coords from 0 to 1
// Gives us something like (0.4, 0,2)
vector_float2 uv = position/box.zw;
// Normalised pixel coords from 0 to 1
// Gives us something like (0.4, 0,2)
vector_float2 uv = position/box.zw;Next, we need to do something with these. This math is a little rough to look at, but we'll break it down.
// Calculate color as a function of the position & time
// Start from 0.5 to brighten the colors ( we don't want this to be dark )
// The rest of the color components should be a percentage of whatever is left of 0.5.
// To make this brighter, increase the first value.
vector_float3 col = 0.5 + 0.5 *cos(secs+uv.xyx+float3(0, 2, 4));
// Calculate color as a function of the position & time
// Start from 0.5 to brighten the colors ( we don't want this to be dark )
// The rest of the color components should be a percentage of whatever is left of 0.5.
// To make this brighter, increase the first value.
vector_float3 col = 0.5 + 0.5 *cos(secs+uv.xyx+float3(0, 2, 4));We start with 0.5 to say that the colors should be at least a medium grey. 0.5 as a vector_float3, converted to RGB, would be 127.5, 127.5, 127.5. If we returned just that, we'd get a kinda grey screen.
Next, we work out how much color to mix in to our base value. To do this, we start with secs to essentially "push" the values along, then add the xyx from our uv, which is a vector_float3 from our base uv.
Finally, we add (0, 2, 4) to slightly tint the whole thing to lean a little more to specific colors.
We wrap this in cos, as cos returns the cosine of the angle in radians, which we can use as a decimal value in our floats, and it also happens to be a pretty lovely curve for use with color.
This shader is the default shader you get when you create a new project on Shader Toy. Shader Toy is a fun website where you can experiment with shaders in your browser, and has plenty of examples for you to work from. If you get stuck on some math, or need some inspiration, head there and you'll find something! It's written in a different language, but converting it is often as simple as changing a
vec2intovector_float2.
As a whole, our function looks like this.
[[ stitchable ]] half4 gradientify(
    float2 position,
    half4 color,
    float4 box,
    float secs
) {
    // Normalised pixel coords from 0 to 1
    vector_float2 uv = position/box.zw;
    // Calculate color as a function of the position & time
    // Start from 0.5 to brighten the colors ( we don't want this to be dark )
    vector_float3 col = 0.5 + 0.5 *cos(secs+uv.xyx+float3(0, 2, 4));
    return half4(col.x, col.y, col.z, 1);
}
[[ stitchable ]] half4 gradientify(
float2 position,
half4 color,
float4 box,
float secs
) {
// Normalised pixel coords from 0 to 1
vector_float2 uv = position/box.zw;
// Calculate color as a function of the position & time
// Start from 0.5 to brighten the colors ( we don't want this to be dark )
vector_float3 col = 0.5 + 0.5 *cos(secs+uv.xyx+float3(0, 2, 4));
return half4(col.x, col.y, col.z, 1);
}Lets make our new modifier, starting with the same function we had before and just changing the name.
func gradientEffect() -> some View {
    let function = ShaderFunction(
        library: .default,
        name: "gradientify"
    )
    let shader = Shader(function: function, arguments: [])
    return self.colorEffect(shader, isEnabled: true)
}
func gradientEffect() -> some View {
let function = ShaderFunction(
library: .default,
name: "gradientify"
)
let shader = Shader(function: function, arguments: [])
return self.colorEffect(shader, isEnabled: true)
}If we ran this, we'd get a console error - because we've missed some parameters, so it can't build the pipeline.
It's worth remembering this - you won't really get errors from this, you'll get console failures and your shaders won't work, so pay attention to the console.
Lets add our missing parameters now so it's happy.
Inside our empty arguments array, we'll need to provide the two arguments, a float4, and a float. These are types exposed to us as shader arguments, which make it easier to pass things around. Remember, the first is a box, and the second is the time in seconds.
We're not going to need a GeometryReader though - there's a special parameter, boundingRect, that means SwiftUI itself will pass us the box.
let shader = Shader(function: function, arguments: [
    .boundingRect,
    .float(seconds)
])
let shader = Shader(function: function, arguments: [
.boundingRect,
.float(seconds)
])We'll of course have to pass the secs through SwiftUI, so add them to the modifer too.
func gradientEffect(seconds: Double) -> some View {
let function = ShaderFunction(
library: .default,
name: "gradientify"
)
let shader = Shader(function: function, arguments: [
    .boundingRect,
    .float(seconds)
])
return self.colorEffect(shader, isEnabled: true)
}func gradientEffect(seconds: Double) -> some View {
let function = ShaderFunction(
library: .default,
name: "gradientify"
)
let shader = Shader(function: function, arguments: [
.boundingRect,
.float(seconds)
])
return self.colorEffect(shader, isEnabled: true)
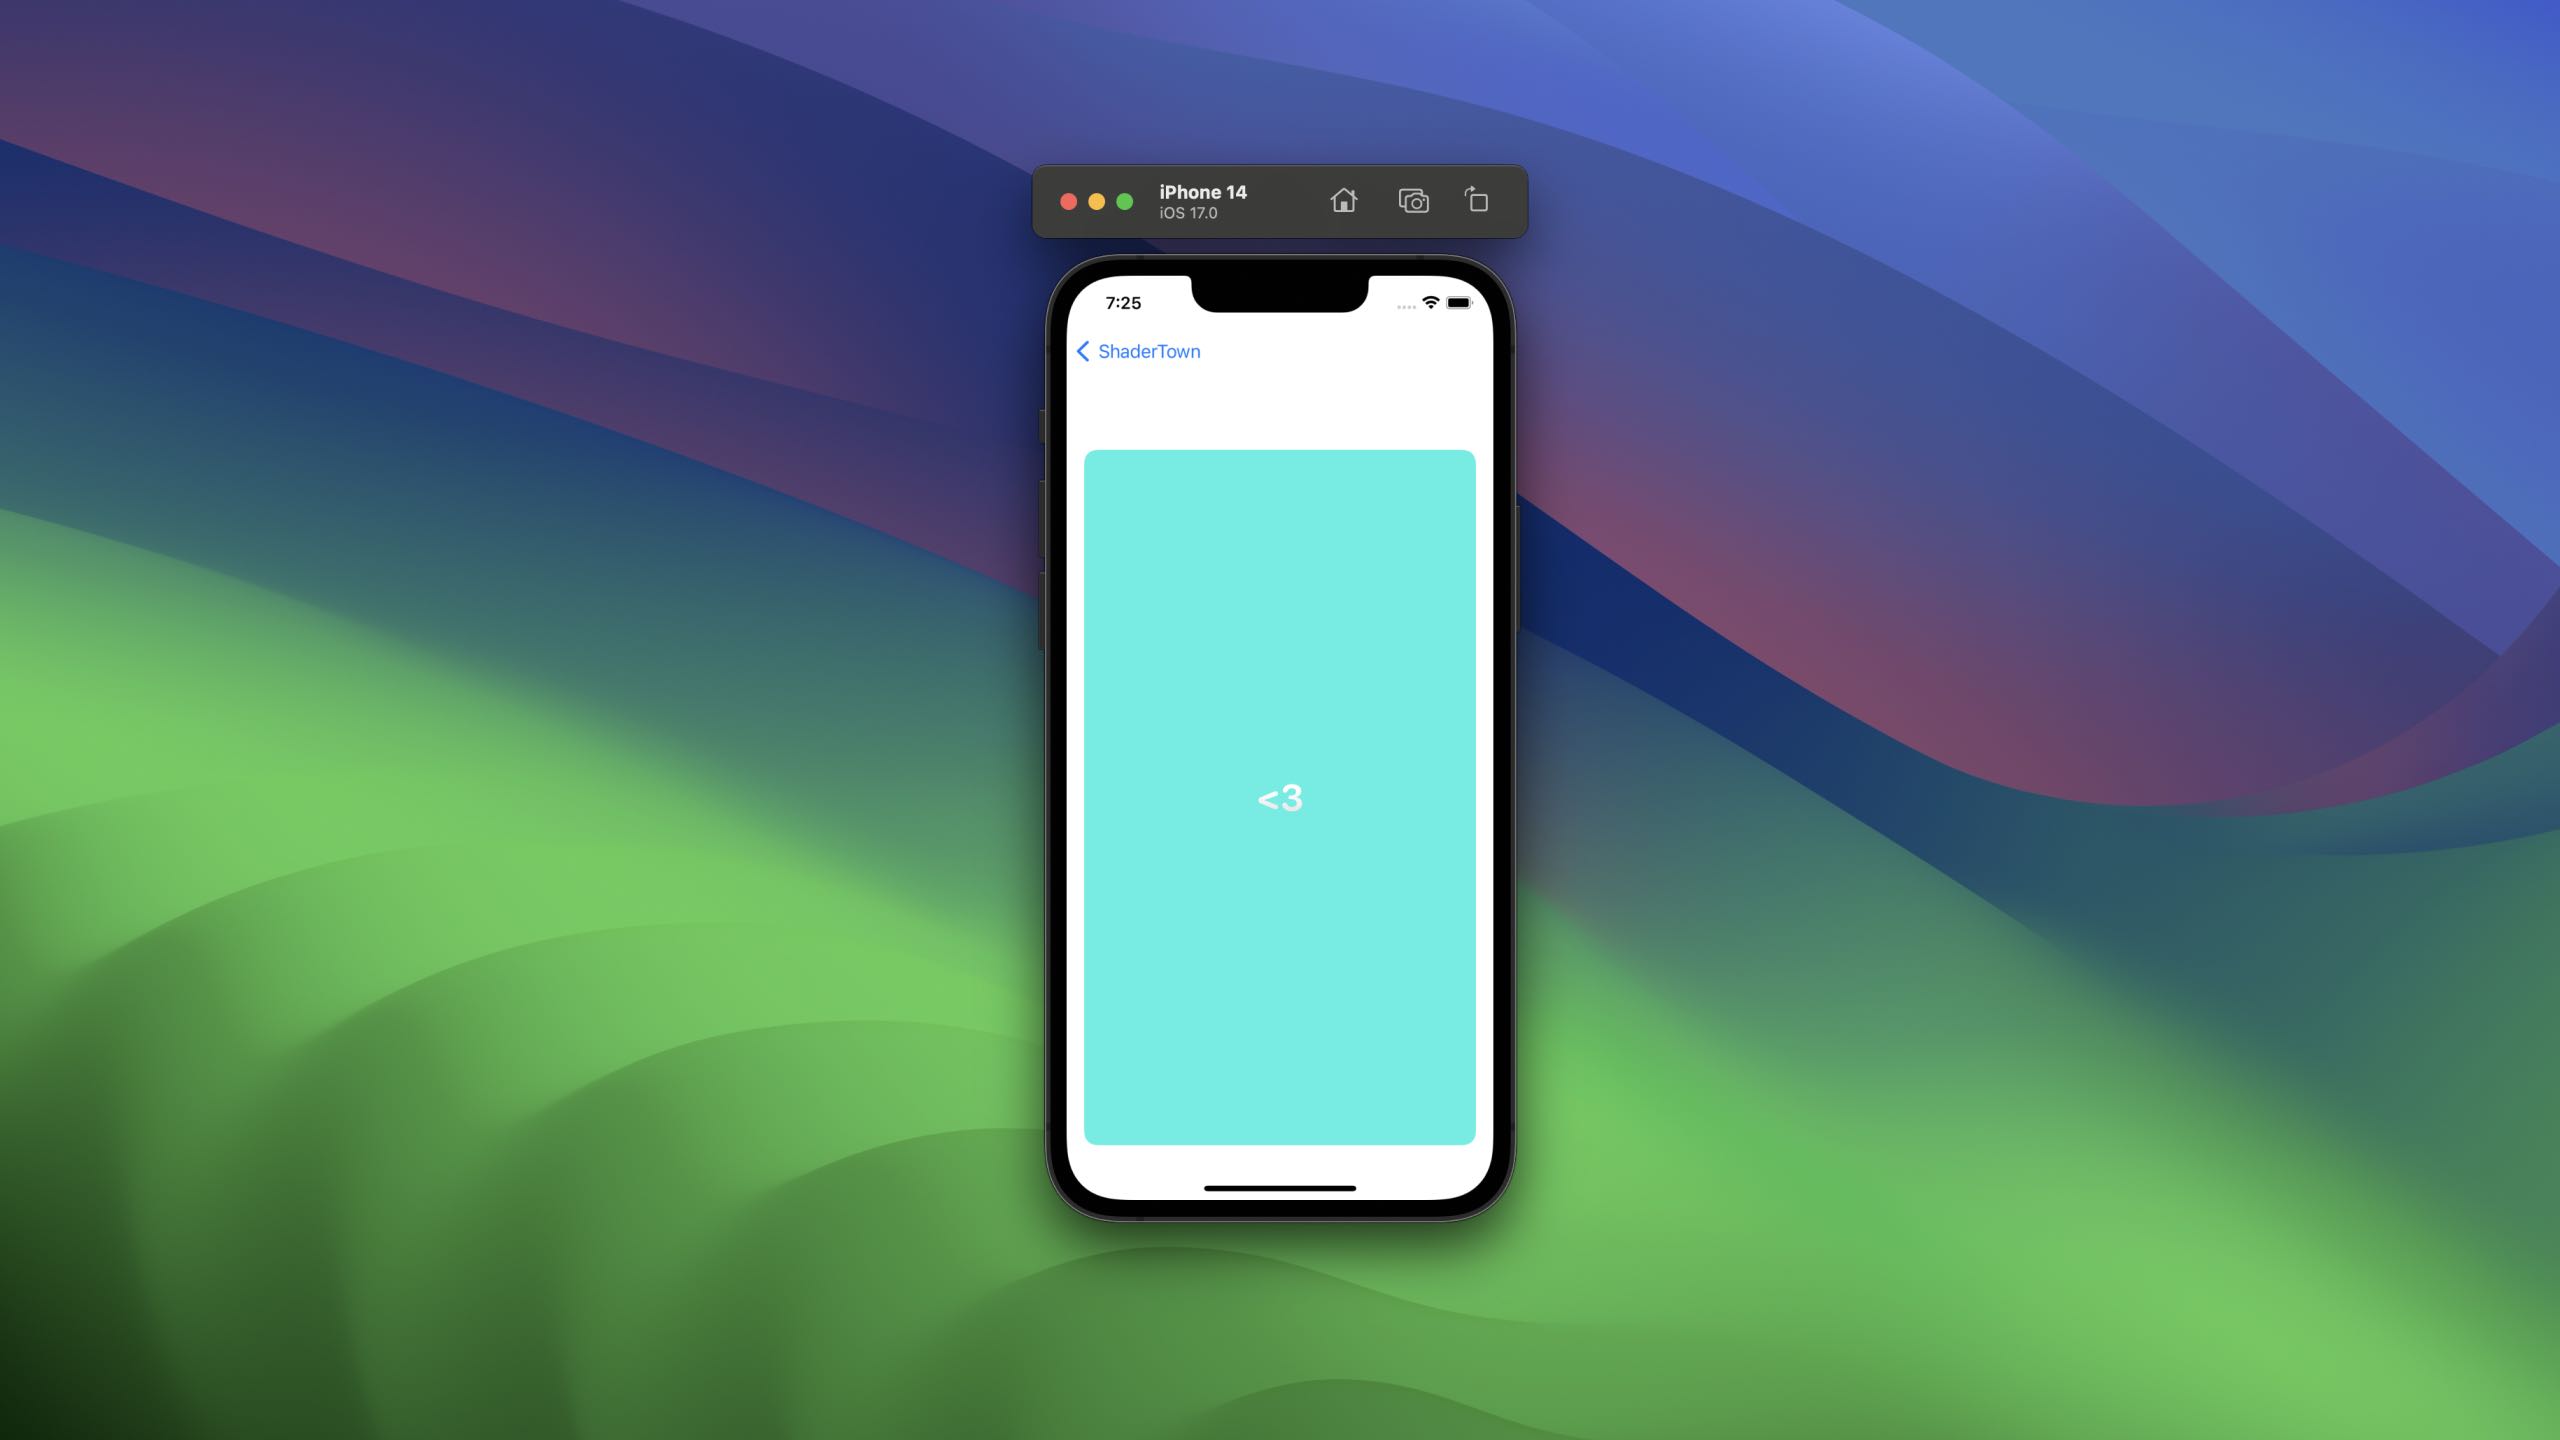
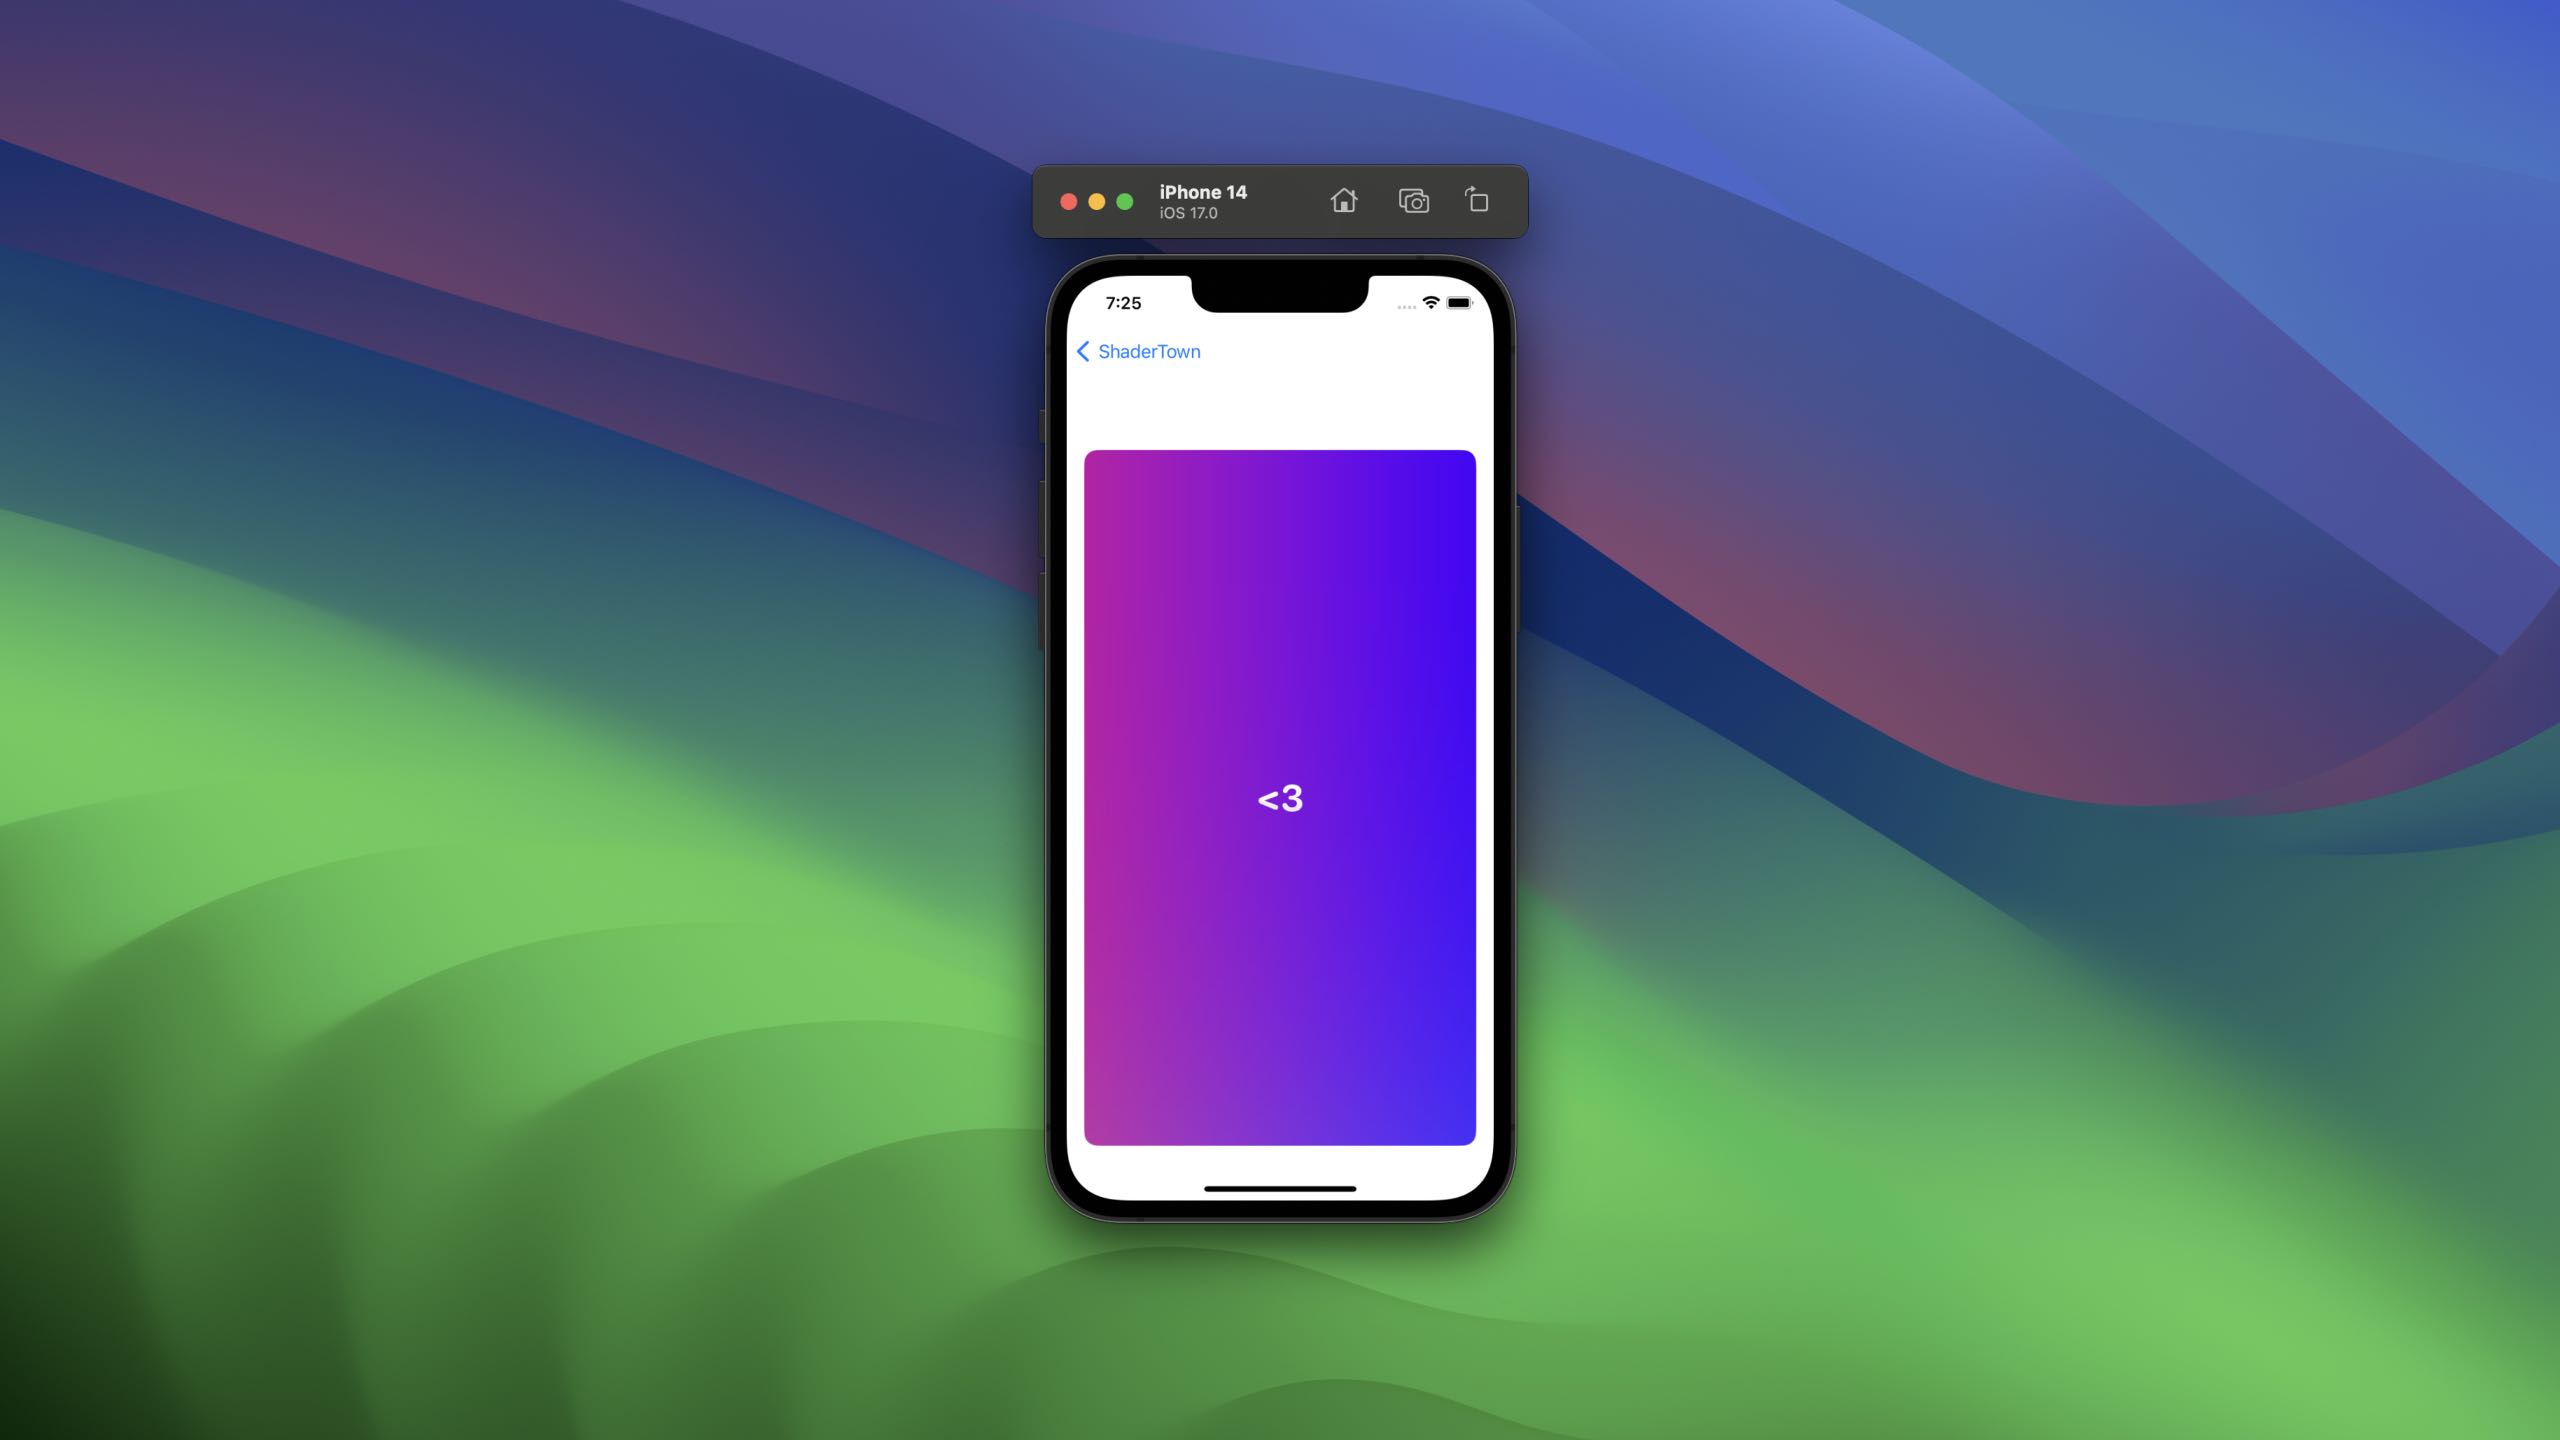
}The nicest way I've found to provide these parameters is something like this, using a TimelineView.
My TimelineView is set to .animation, and I just do a quick subtract to work out how far along we are.
struct ContentView: View {
    let start = Date()

    var body: some View {
        VStack {
            TimelineView(.animation) { context in
                RoundedRectangle(cornerRadius: 12)
                    .foregroundStyle(.pink)
                    .gradientEffect(
                        seconds: context.date.timeIntervalSince1970 - self.start.timeIntervalSince1970
                    )
                    .overlay {
                        // You don't actually need to put a love heart on top of your views, but it helps <3
                        VStack {
                            Text("<3")
                                .font(.largeTitle.bold())
                                .fontDesign(.rounded)
                                .foregroundStyle(.white.gradient)
                        }
                    }
                    .clipShape(RoundedRectangle(cornerRadius: 12))
            }

        }
        .padding()
    }
}
struct ContentView: View {
let start = Date()
var body: some View {
VStack {
TimelineView(.animation) { context in
RoundedRectangle(cornerRadius: 12)
.foregroundStyle(.pink)
.gradientEffect(
seconds: context.date.timeIntervalSince1970 - self.start.timeIntervalSince1970
)
.overlay {
// You don't actually need to put a love heart on top of your views, but it helps <3
VStack {
Text("<3")
.font(.largeTitle.bold())
.fontDesign(.rounded)
.foregroundStyle(.white.gradient)
}
}
.clipShape(RoundedRectangle(cornerRadius: 12))
}
}
.padding()
}
}Running that gives you a lovely gradient that rotates over time.
You can quickly see how this stuff works. In our example, we've ignored the color provided to us by the system and just returned our own - but what if we didn't?
Here's a simple shader for people that don't like the color red. I ignore the red provided to me, and return the other colors as is. If you applied this to a pink view, you'd get a lovely looking blue.
[[ stitchable ]] half4 removeRed(
    float2 position,
    half4 color
) {
    color.x = 0;
    return color;
}
[[ stitchable ]] half4 removeRed(
float2 position,
half4 color
) {
color.x = 0;
return color;
}
You could potentially combine both of these, and make a gradient that starts from the color of the pixel, and brightens it over time. There's a lot of possibilites with shaders, and they're super fun to work on!
There's two more effects available to us, so lets say a quick hello to those too.
Layer Effects
There's another method provided to us by SwiftUI, and it's slightly different, called layerEffect.
Layer effects are applied similiarly to colorEffect, except they're given extra context about the SwiftUI::Layer, rather than just one individual pixel.
Let's write a simple shader that samples the current pixel from the layer, and applies a little math to it, to make a gradient thats based on the layer color.
First up, we need to import the SwiftUI helper inside our metal file - this contains the magic.
#include <SwiftUI/SwiftUI_Metal.h>#include <SwiftUI/SwiftUI_Metal.h>Next, we need a new function signature that uses it. Ours is going to be called gradientSubtract.
We'll get the position just like before, but we'll also be provided with layer.
Lets also add a final property to represent the bounds of the view, which we've used before - boundingRect.
[[ stitchable ]] half4 gradientSubtract(
    float2 position,
    SwiftUI::Layer layer,
    float4 bounds
)
/// Apple's Requirement
[[ stitchable ]] half4 name(float2 position, SwiftUI::Layer layer, args...)
[[ stitchable ]] half4 gradientSubtract(
float2 position,
SwiftUI::Layer layer,
float4 bounds
)
/// Apple's Requirement
[[ stitchable ]] half4 name(float2 position, SwiftUI::Layer layer, args...)SwiftUI::Layer is a helper that lets us sample pixels, which we can do by calling layer.sample(coordinates).
You can sample the current pixel, or you can sample pixels around it, provided you don't go over the max sample size provided to the call to layerEffect.
We're going to do something very similar to our previous gradient, except this time, we'll subtract a given value from the underlying color, making sure our effect reflects what it's applied to.
[[ stitchable ]] half4 gradientSubtract(
    float2 position,
    SwiftUI::Layer layer,
    float4 bounds
) {
// Normalise coordinates
// This time we're taking a float2 out of a float4, which we do with zw
float2 uv = position / bounds.zw;
// Get our pixel color
half4 pixelColor = layer.sample(position);
// Alter this number to affect how close this will be to the base color
float offset = 0.5;
// Remove from the base color, returning a new color
return pixelColor - half4(uv.x * offset, uv.y * offset, 0, 0);
}
[[ stitchable ]] half4 gradientSubtract(
float2 position,
SwiftUI::Layer layer,
float4 bounds
) {
// Normalise coordinates
// This time we're taking a float2 out of a float4, which we do with zw
float2 uv = position / bounds.zw;
// Get our pixel color
half4 pixelColor = layer.sample(position);
// Alter this number to affect how close this will be to the base color
float offset = 0.5;
// Remove from the base color, returning a new color
return pixelColor - half4(uv.x * offset, uv.y * offset, 0, 0);
}Im taking away red based on how far they are along the X axis, and green based on the Y, but leaving blue alone. If you apply this to white, you get a lovely looking effect.
To write our function to apply this, we're going to do something different. Lets start with an empty modifier just like before, called gradientSubtract.
extension View {
    func gradientSubtract() -> some View {

    }
}
extension View {
func gradientSubtract() -> some View {
}
}There's some magic avilable to us if we use the ShaderLibrary. This behaves similar to a Module in that it's generated for us, and we can access parts of our resources through it.
Calling ShaderLibrary.default will give us a reference to the library, and we can then call functions on it as if they were swift, so in this case, we'd call ShaderLibrary.default.gradientSubtract.
extension View {
    func gradientSubtract() -> some View {
        self.layerEffect(
            ShaderLibrary.default.gradientSubtract(.boundingRect),
            maxSampleOffset: .zero
        )
    }
}
extension View {
func gradientSubtract() -> some View {
self.layerEffect(
ShaderLibrary.default.gradientSubtract(.boundingRect),
maxSampleOffset: .zero
)
}
}I've set my sample offset to zero as I'm only sampling the current pixel, but you'll need to make sure this is appropriate for your effect.
Lets take a quick look at how you could sample pixels that aren't the current, with a simple shader that checks if an upcoming pixel is a specific color, and we're another color, we should replace the color.
Let's call this one pixelPeep, and it'll have the same signature as before.
[[ stitchable ]] half4 pixelPeep(
    float2 position,
    SwiftUI::Layer layer
)
[[ stitchable ]] half4 pixelPeep(
float2 position,
SwiftUI::Layer layer
)To make our effect work, we simply need to check the pixels other than the current one, using layer.sample(position.x + 20).
The rest is trivial - check if its red or green, and if both are true, return a different color.
half4 pixelColor = layer.sample(position);
half4 lookAheadPixelColor = layer.sample(position.x + 20);

bool pixelIsRed = pixelColor.x == 1 && pixelColor.y == 0 && pixelColor.z == 0;
bool lookAheadIsGreen = lookAheadPixelColor.x == 0 && lookAheadPixelColor.y == 1 && lookAheadPixelColor.z == 0;

if (pixelIsRed && lookAheadIsGreen) {
    return half4(0, 0.8, 0.8, 1);
}

return layer.sample(position);
half4 pixelColor = layer.sample(position);
half4 lookAheadPixelColor = layer.sample(position.x + 20);
bool pixelIsRed = pixelColor.x == 1 && pixelColor.y == 0 && pixelColor.z == 0;
bool lookAheadIsGreen = lookAheadPixelColor.x == 0 && lookAheadPixelColor.y == 1 && lookAheadPixelColor.z == 0;
if (pixelIsRed && lookAheadIsGreen) {
return half4(0, 0.8, 0.8, 1);
}
return layer.sample(position);So we're looking ahead on the x axis, checking whats coming up, and using that to replace the color. This would be a good starting point to consider something like a blend between the two.
Our modifier for this is just like we had before - but with the new name.
extension View {
    func pixelPeep() -> some View {
        return self.layerEffect(
            ShaderLibrary.default.pixelPeep(),
            maxSampleOffset: .init(width: 200, height: 200)
        )
    }
}
extension View {
func pixelPeep() -> some View {
return self.layerEffect(
ShaderLibrary.default.pixelPeep(),
maxSampleOffset: .init(width: 200, height: 200)
)
}
}To test it, here's a super simple view that shows both colors, and applies the affect.
struct PixelPeep: View {
    var body: some View {
        VStack {
            HStack(spacing: 0) {
                Rectangle()
                    .foregroundStyle(Color(red: 1, green: 0, blue: 0))
                Rectangle()
                    .foregroundStyle(Color(red: 0, green: 1, blue: 0))
            }
            .drawingGroup()
            .pixelPeep()
            .frame(width: 200, height: 200)
            .clipShape(RoundedRectangle(cornerRadius: 12))
        }
    }
}
struct PixelPeep: View {
var body: some View {
VStack {
HStack(spacing: 0) {
Rectangle()
.foregroundStyle(Color(red: 1, green: 0, blue: 0))
Rectangle()
.foregroundStyle(Color(red: 0, green: 1, blue: 0))
}
.drawingGroup()
.pixelPeep()
.frame(width: 200, height: 200)
.clipShape(RoundedRectangle(cornerRadius: 12))
}
}
}Note that I've used drawingGroup() before pixelPeep() to make sure these are sent to metal as one stack, not two layers.
![]()
Distortion Effects
A distortion effect is the final method, and one that we use to distort pixels, by shifting them around in the coordinate space.
I have a feeling there's going to be some really fun stuff with this. For our example, we're going to take every pixel from the left of a view, and put it on the fight, and vice versa.
This time, we have an even simpler function signature required, as we're just returning the coordinate the pixel should be in.
Lets call ours pixelFlip, and be sure to pass in the bounds again.
[[ stitchable ]] float2 pixelFlip(float2 position, float4 bounds)
/// Apple Required
[[ stitchable ]] float2 name(float2 position, args...)
[[ stitchable ]] float2 pixelFlip(float2 position, float4 bounds)
/// Apple Required
[[ stitchable ]] float2 name(float2 position, args...)The body for this one is really easy. Check if the pixel is above halfway, and if so, take away half the width, otherwise, add it. This can be simplified into just a function of it's x position.
[[ stitchable ]] float2 pixelFlip(float2 position, float4 bounds) {
    // Normalise coordinates
    float2 uv = position / bounds.zw;
    // Offset by our offset from 0, so the further away you are, the closer you get
    return position.x = ((1 - (uv.x * 1)) * bounds.z);
}
[[ stitchable ]] float2 pixelFlip(float2 position, float4 bounds) {
// Normalise coordinates
float2 uv = position / bounds.zw;
// Offset by our offset from 0, so the further away you are, the closer you get
return position.x = ((1 - (uv.x * 1)) * bounds.z);
}Our modifier for this is nothing new - just remember we need a sample size big enough for our view. In this case its a 200x200 box, so I'll say 200 in either direction is ok.
extension View {
    func pixelFlip() -> some View {
        return self.distortionEffect(
            ShaderLibrary.default.pixelFlip(.boundingRect),
            maxSampleOffset: .init(width: 200, height: 200)
        )
    }
}
extension View {
func pixelFlip() -> some View {
return self.distortionEffect(
ShaderLibrary.default.pixelFlip(.boundingRect),
maxSampleOffset: .init(width: 200, height: 200)
)
}
}If you run this with a simple view of two colors in a HStack, you'll see they swap around.
![]()
This is a really simple example, but you can see quickly how you might adjust views. Some great examples of this may include a ripple effect.
Something real fancy
Look, I get it, this is all simple, you're probably here for the fancy stuff.
Don't worry - I got you.
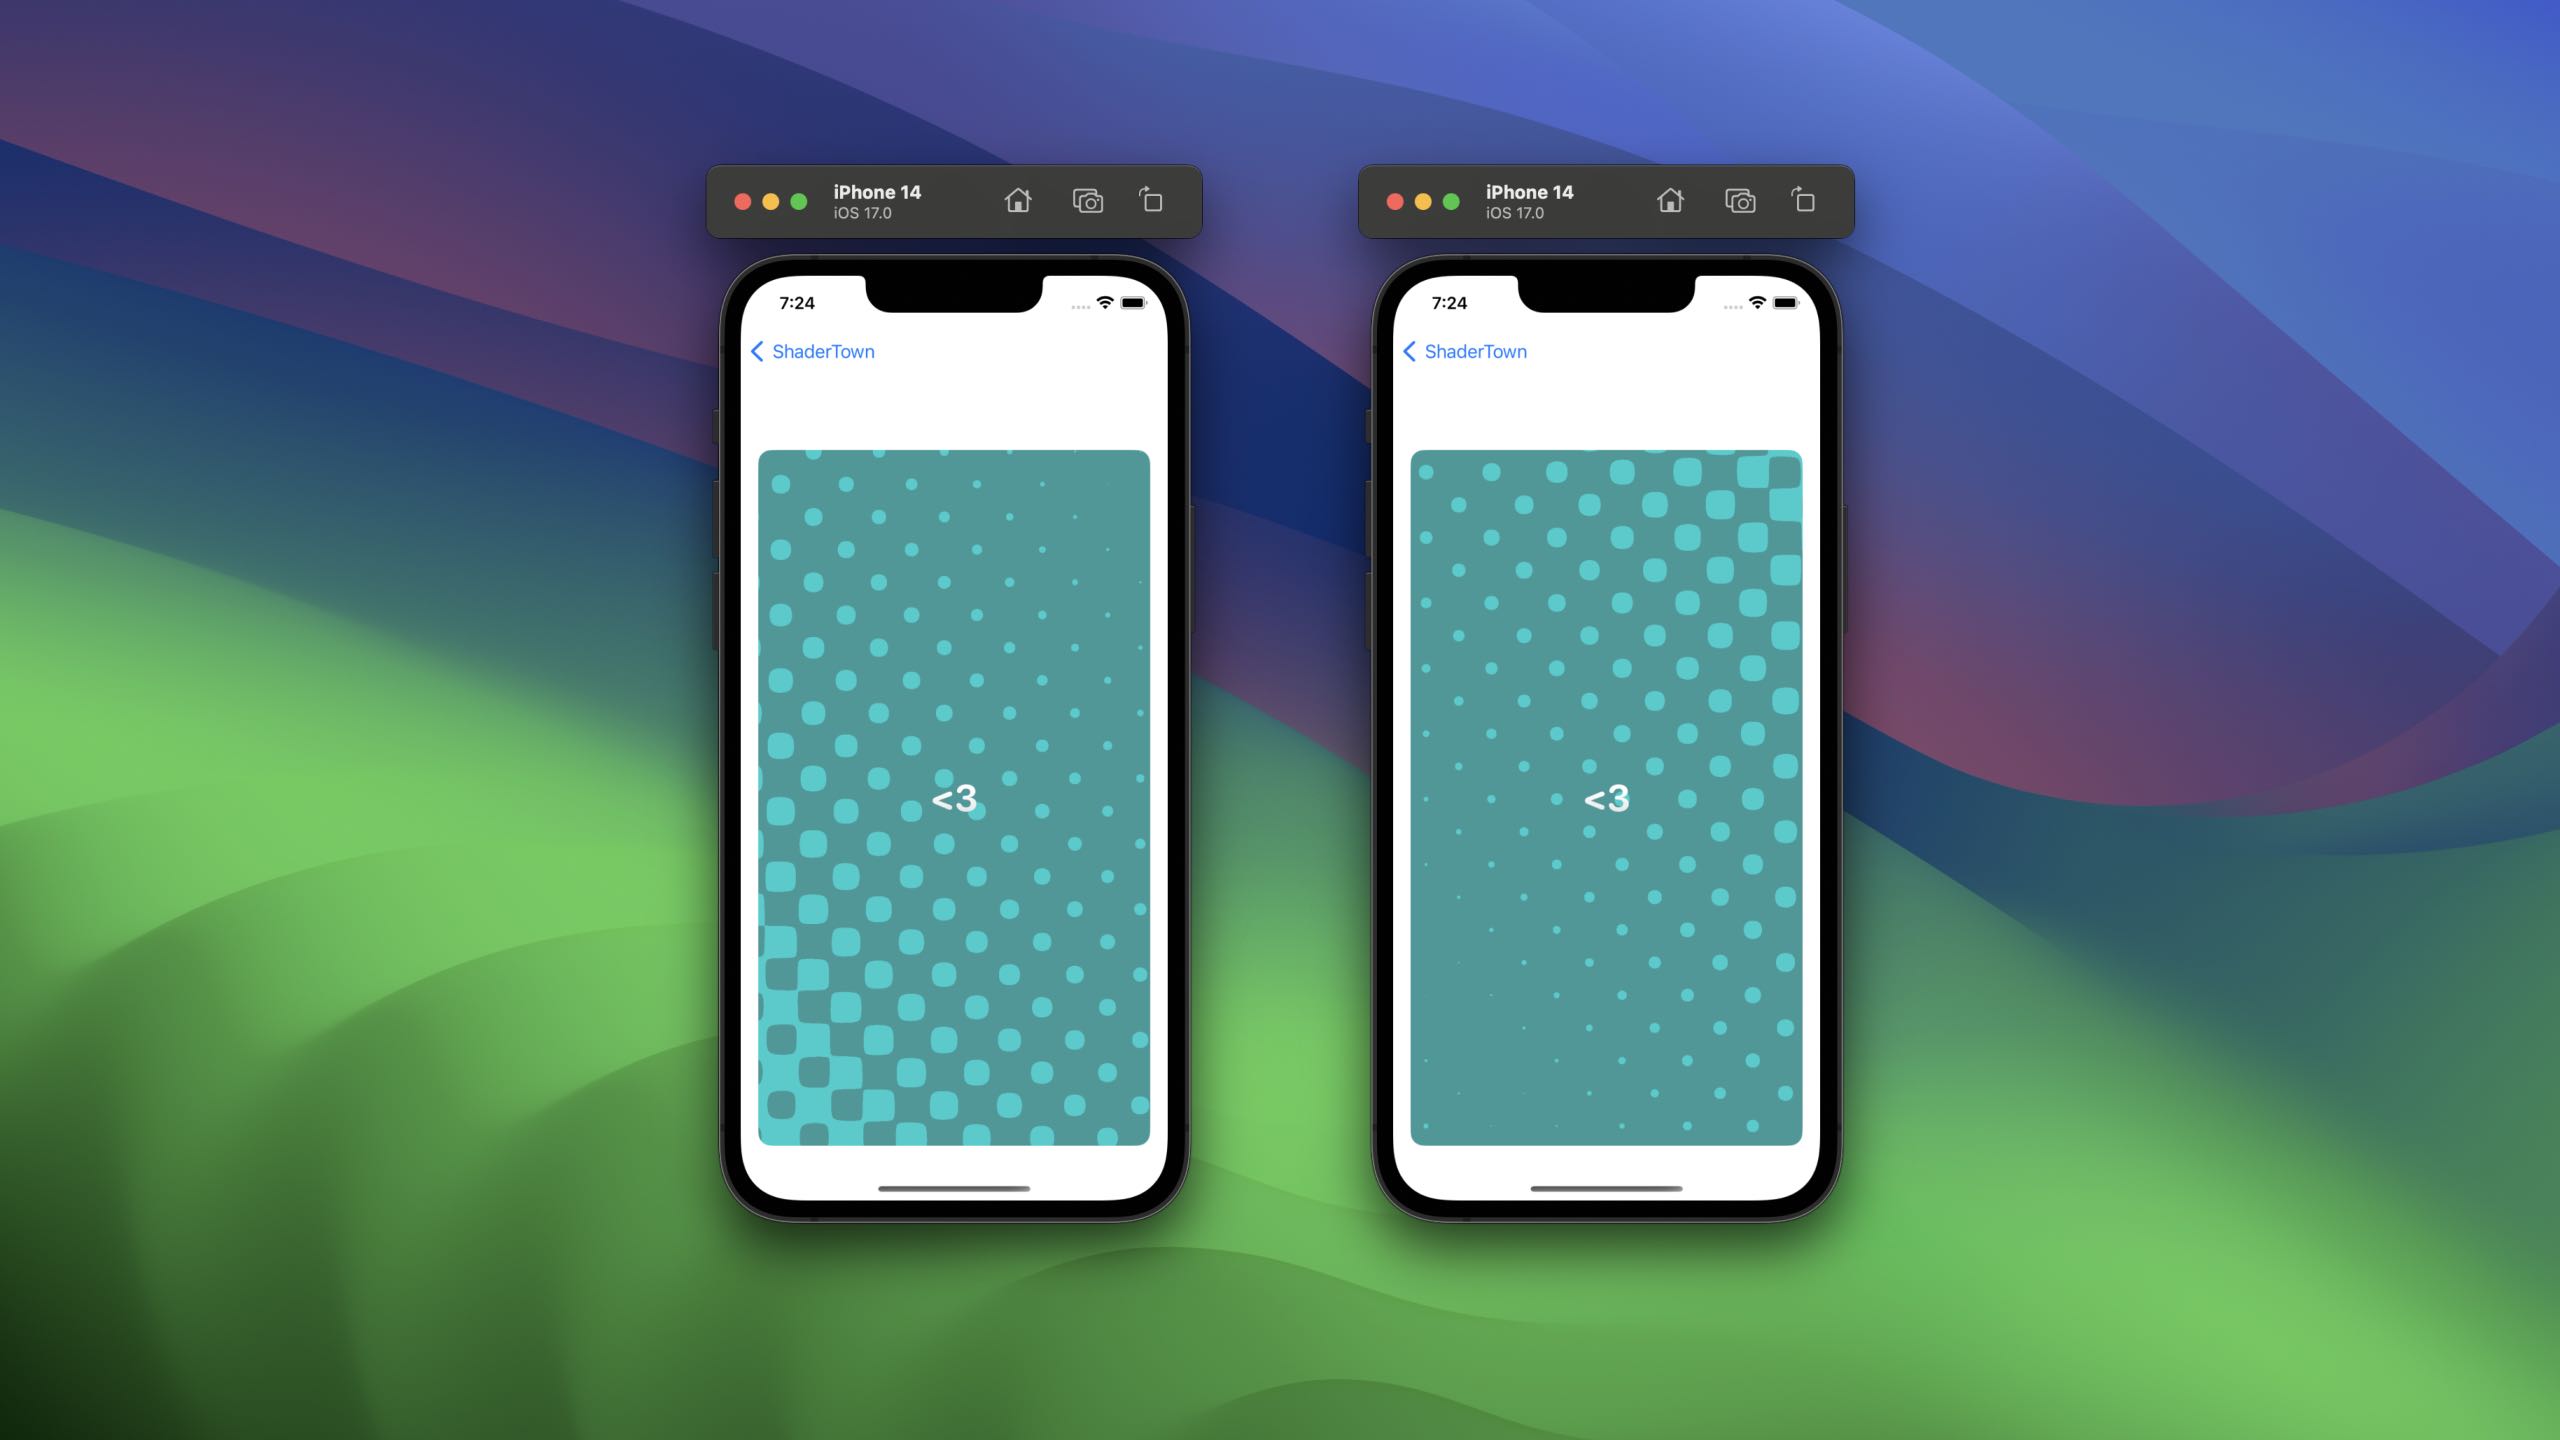
Let me give you one more shader, that shows a pattern of squares over time, that glow at various intervals.
This is based on the "Circle Pattern Loader" shader from Shader Toy.
Lets cut right to the code.
[[ stitchable ]] half4 circleLoader(
    float2 position,
    half4 color,
    float4 bounds,
    float secs
) {
    float cols = 6;
    float PI2 = 6.2831853071795864769252867665590;
    float timeScale = 0.04;

    vector_float2 uv = position/bounds.zw;

    float circle_rows = (cols * bounds.w) / bounds.z;
    float scaledTime = secs * timeScale;

    float circle = -cos((uv.x - scaledTime) * PI2 * cols) * cos((uv.y + scaledTime) * PI2 * circle_rows);
    float stepCircle = step(circle, -sin(secs + uv.x - uv.y));

    // Blue Colors
    vector_float4 background = vector_float4(0.2, 0.6, 0.6, 1.0);
    vector_float4 circles = vector_float4(0, 0.8, 0.8, 1.0);

    return half4(mix(background, circles, stepCircle));
}
[[ stitchable ]] half4 circleLoader(
float2 position,
half4 color,
float4 bounds,
float secs
) {
float cols = 6;
float PI2 = 6.2831853071795864769252867665590;
float timeScale = 0.04;
vector_float2 uv = position/bounds.zw;
float circle_rows = (cols * bounds.w) / bounds.z;
float scaledTime = secs * timeScale;
float circle = -cos((uv.x - scaledTime) * PI2 * cols) * cos((uv.y + scaledTime) * PI2 * circle_rows);
float stepCircle = step(circle, -sin(secs + uv.x - uv.y));
// Blue Colors
vector_float4 background = vector_float4(0.2, 0.6, 0.6, 1.0);
vector_float4 circles = vector_float4(0, 0.8, 0.8, 1.0);
return half4(mix(background, circles, stepCircle));
}To use this in a view, it's super simple.
struct CircleLoader: View {
    let start = Date()

    var body: some View {
        VStack {
            TimelineView(.animation) { context in
                RoundedRectangle(cornerRadius: 12)
                    .foregroundStyle(.white)
                    .circleLoader(
                        seconds: context.date.timeIntervalSince1970 - self.start.timeIntervalSince1970
                    )
                    .overlay {
                        VStack {
                            Text("<3")
                                .font(.largeTitle.bold())
                                .fontDesign(.rounded)
                                .foregroundStyle(.white.gradient)
                        }
                    }
                    .clipShape(RoundedRectangle(cornerRadius: 12))
            }

        }
        .padding()
    }
}

extension View {
    func circleLoader(seconds: Double) -> some View {
        self
            .colorEffect(
                ShaderLibrary.default.circleLoader(.boundingRect, .float(seconds))
            )
    }
}
struct CircleLoader: View {
let start = Date()
var body: some View {
VStack {
TimelineView(.animation) { context in
RoundedRectangle(cornerRadius: 12)
.foregroundStyle(.white)
.circleLoader(
seconds: context.date.timeIntervalSince1970 - self.start.timeIntervalSince1970
)
.overlay {
VStack {
Text("<3")
.font(.largeTitle.bold())
.fontDesign(.rounded)
.foregroundStyle(.white.gradient)
}
}
.clipShape(RoundedRectangle(cornerRadius: 12))
}
}
.padding()
}
}
extension View {
func circleLoader(seconds: Double) -> some View {
self
.colorEffect(
ShaderLibrary.default.circleLoader(.boundingRect, .float(seconds))
)
}
}Run it, and you'll get something lovely.
I'd reccomend playing around with this, for example, why not hook up the colors to the gradient we did earlier? you can get some super cool effects.
Thank you so much for reading this brief intro. There's so much to learn with shaders, and I can't wait to see what people make.
I'd like to give a shoutout to Bobby for pointing me in the right direction with places to learn shaders, and for sharing his incredible work on distortion effects.
If you're looking for even more inspiration, consider DLX, who has created some effects I can't quite comprehend ( like they're right out of monument valley ).
For some further learning on shaders, including the fundamentals, check out the free to read book of shaders.
My code is on Github as always, and you'll find me over on twitter @SwiftyAlex.